In today’s digital landscape, AI influencer videos are soaring in popularity, captivating audiences worldwide with their innovative blend of technology and creativity.
These videos push the boundaries of content creation and open new doors for storytelling and brand promotion.
However, venturing into this new territory has its fair share of hurdles. Many of you have shared your struggles and frustrations, echoing a common sentiment: “Why isn’t it working for me?”
I hear you loud and clear. The journey to mastering AI influencer videos is fraught with pitfalls, from technical glitches to ethical quandaries. But don’t let these challenges deter you.
I’m here to guide you through a fail-proof process meticulously crafted to navigate the complexities of AI video creation.
Whether you’re grappling with software issues or tangled in the web of do’s and don’ts, this guide promises to be your beacon in the murky waters of AI video production.
Together, we’ll embark on a journey to overcome these obstacles and harness AI’s full potential in crafting videos that dazzle and engage.
So, buckle up and prepare to dive deep into the world of AI influencer videos, where innovation meets imagination. Let’s make your AI influencer video journey a success story waiting to be told.
Read more:
Step-by-Step Guide: Create AI Influencer Videos
Creating AI influencer videos can initially seem daunting, but with the proper guidance, it’s a breeze. Here’s how to do it:
Step 1: Preparation and Ethics
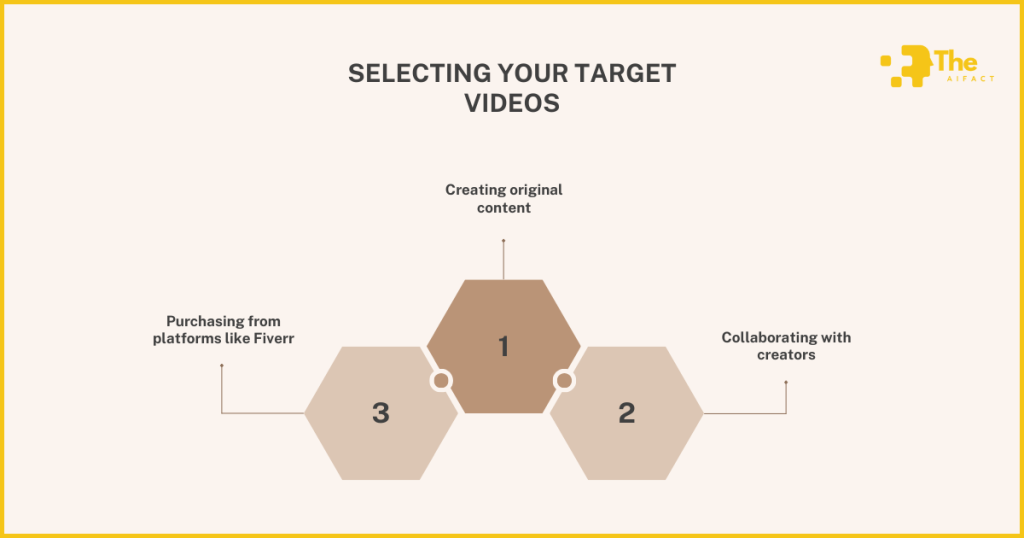
Embarking on creating AI influencer videos begins with a crucial first step: selecting your target videos. This choice forms the backbone of your project, setting the tone and direction for your creative endeavor.
It’s not just about picking any video; it’s about choosing the right video. This means considering the content’s relevance, the message you wish to convey, and the visual aesthetics that align with your AI influencer’s persona.
When it comes to acquiring these videos, you have a few ethical and practical paths to explore:
- Creating original content is always the gold standard. It ensures uniqueness and complete creative control, allowing your vision to shine without constraints.
- Collaborating with creators can enrich your project with diverse perspectives. Reach out to fellow content creators for a mutually beneficial partnership where both parties agree on the use of content.
- Purchasing from platforms like Fiverr offers a convenient solution. Here, you can commission custom videos tailored to your specifications, ensuring quality and originality.
Step 2: File Organization and Naming

After selecting your target videos carefully and ethically, the next step is to organize and name your files to pave the way for a smooth creation process. This seemingly mundane step is where the magic of organization meets the technical needs of AI video production.
Creating a New Folder
Start by creating a new, dedicated folder on your computer. This folder will be the new home for all your target videos, source images, and, eventually, the AI-generated influencer videos.
Think of this folder as your project’s headquarters, where every file related to your venture is easily accessible.
This helps keep your workspace clutter-free and streamlines the workflow, making the video creation process more efficient.
File Naming Conventions
When naming your files, simplicity and clarity are your best friends. The importance of naming files without spaces cannot be overstated. This practice isn’t just about keeping things neat; it’s a technical necessity.
Many video editing and AI processing tools have difficulty recognizing file names with spaces, leading to potential errors and hiccups in production.
To ensure seamless processing, adopt a naming convention that:
- Eliminates spaces. Use underscores (_) or dashes (-) instead.
- It is descriptive yet concise. For example, ‘target_video_1.mp4’ or ‘source_image_influencer.jpg.’
- Follows a consistent format. This makes it easier to locate and reference files as you work.
Step 3: Source Image Preparation
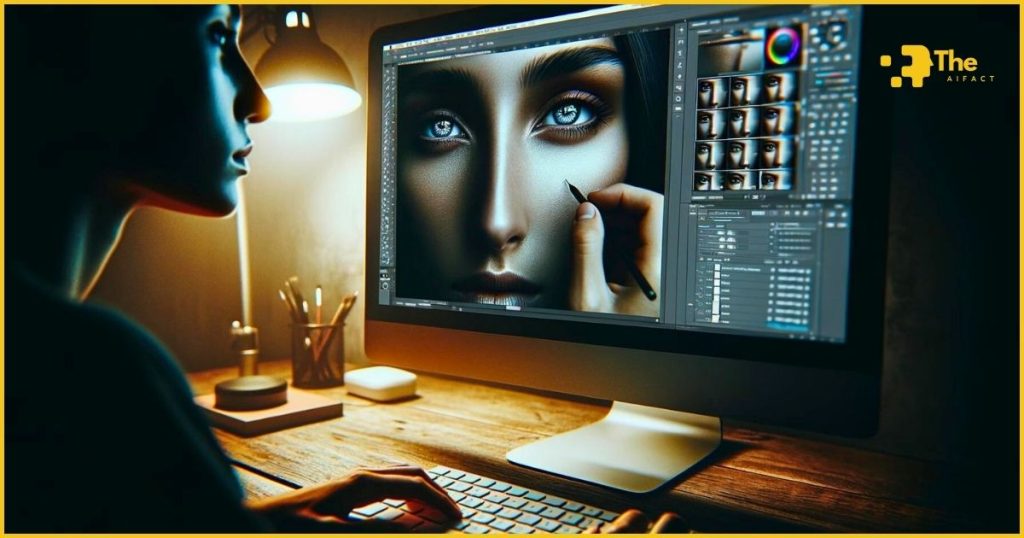
With your files neatly organized and named, it’s time to turn our attention to the source image, the face of your AI influencer.
This step is where your influencer begins to take shape, literally. The choice and preparation of this image are pivotal, as it will be the visage that represents your influencer across videos.
Selecting and Cropping the Source Image
Choosing the right source image requires a blend of artistic vision and technical consideration. Look for a high-quality, front-facing photo of the face you intend to use.
This image should be clear, well-lit, and, ideally, with the subject looking directly at the camera. The expression can vary depending on the personality you’re aiming to project. But neutrality often works best for versatility across different videos.
Once you’ve selected your image from Midjourney or using another AI image tool, the next step is to crop it carefully. The focus should be on the face. Ensure that you crop out unnecessary background elements, maintaining a focus on the facial features.
This doesn’t mean you need a tight close-up; leaving some margin around the face is advisable. But the face should be the image’s unequivocal subject.
Consider the resolution and aspect ratio best suit your target videos when cropping. Precision is critical because the source image must blend seamlessly into various backgrounds and lighting conditions.
Hair Color Discrepancies: A Non-Issue
One concern that might arise is the difference in hair color between your source image and the target videos. Let’s address this straight away: hair color discrepancies are largely irrelevant in the context of AI influencer videos.
The focus of these creations is on the face and its expressions; as such, hair color variations do not significantly impact the believability or quality of your AI-generated videos.
If anything, they add a layer of versatility to your influencer, showcasing their ability to rock multiple looks easily.
Step 4: Using Google Colab for Video Generation
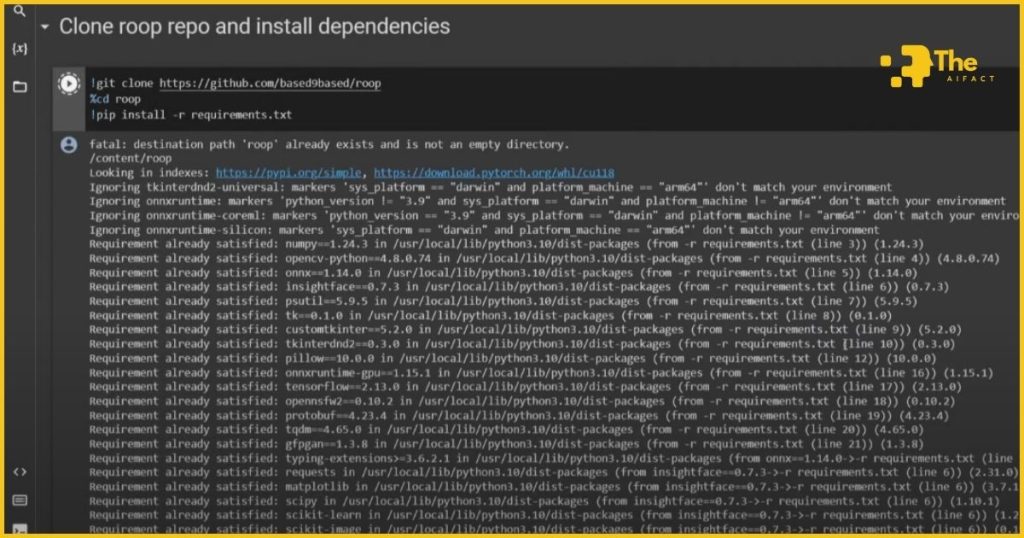
The journey of creating your AI influencer video now takes us to an exciting destination: Google Colab.
This powerful tool offers a user-friendly platform for running complex code to generate your AI influencer videos.
Don’t worry if you’re not a coding guru; the process is designed to be accessible to all.
Navigating to Google Colab
The Google Colab link is your gateway to the pre-prepared script that will do the heavy lifting. Once you click the link, you’ll be directed to the Colab notebook, a cloud-based environment where the magic happens.
If it’s your first time using Colab, take a moment to familiarize yourself with the interface. It’s intuitive and built on the premise that advanced computational processes should be accessible to everyone.
Running the Code Cells
Colab notebooks comprise code cells, each containing a snippet of code that performs a specific task. Here’s how to navigate this process:
- Start by running the first cell. You can do this by clicking the play button (▶) on the left side of the cell. This action initiates the execution of the code within that cell.
- Warnings and error messages may appear, mainly if you use certain functions for the first time. A standard warning concerns the notebook not being authored by Google; you can proceed by clicking “Run anyway.” This trust is based on the reputable source of your notebook link.
- If an error message suggests restarting the runtime, resist the urge to follow this prompt immediately. Such messages can sometimes be misleading. Unless you’re encountering persistent issues, proceed with running the next cell.
Uploading Files
With the initial setup out of the way, it’s time to upload your source image and target videos into Colab:
- Look for the code cell designed for file uploads. Running this cell will bring up an upload interface.
- Select your source image and target videos from your computer. These files will then be uploaded to the Colab environment, which may take a few moments depending on file sizes and your internet speed.
- Once uploaded, these files reside temporarily in the Colab cloud storage, ready to be transformed into your AI influencer video.
This phase is a blend of anticipation and action. As you upload files and run code cells, you’re on the brink of bringing your AI influencer to life.
Google Colab is the crucible where your preparation and creativity begin to crystallize into something tangible.
Each step, from navigating to the notebook to executing the code, is a vital link in the creation chain.
Follow these steps with care, and you’ll soon witness the birth of your AI influencer video, a testament to your vision and perseverance.
Step 5: Generating the AI Influencer Video
With your source image and target videos uploaded to Google Colab, you stand on the precipice of actualizing your AI influencer video.
This stage is where your preparation meets execution, culminating in creating something truly unique.
Let’s dive into the final steps and some crucial troubleshooting tips to ensure your project crosses the finish line seamlessly.
Executing the Final Steps
- Identify the Final Code Cell: The actual video generation process happens in this cell. It will reference the paths of your uploaded source image and target videos. Make sure this cell is ready with the correct paths.
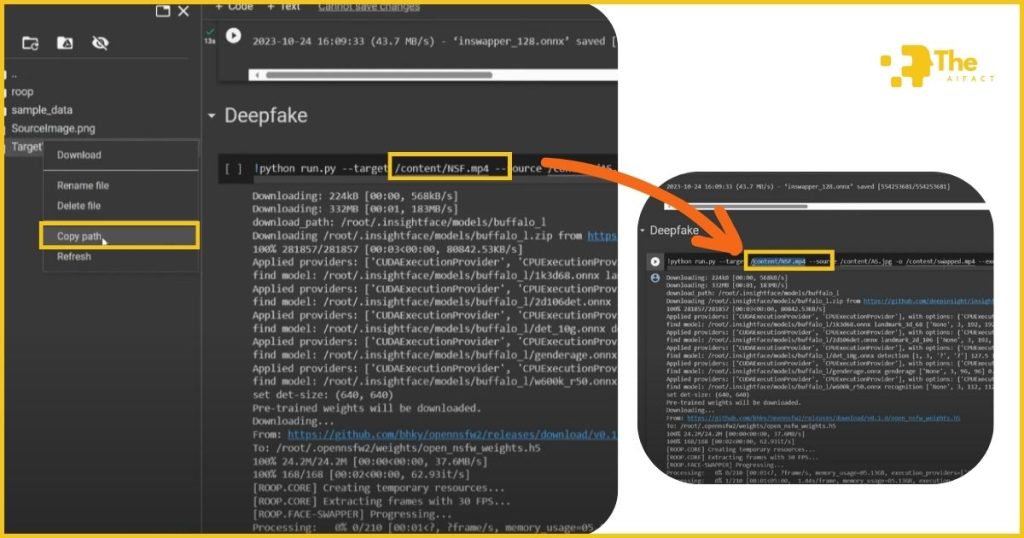
- Replacing the Target Video Path: If creating multiple videos, you must adjust the target video path for each generation. This involves:
- Running the code cell for uploading a new target video.
- Copying the path of the newly uploaded video (usually provided in the output of the upload cell).
- It replaces the existing target video path with the new one in the final code cell. This ensures the code knows which video to transform next.
- Initiating the Video Generation: With the paths correctly set, press the play button on the final code cell. This process may take some time, depending on the length and complexity of your target video. Watch as the cell executes, transforming your inputs into the awaited AI influencer video.
Troubleshooting Tips
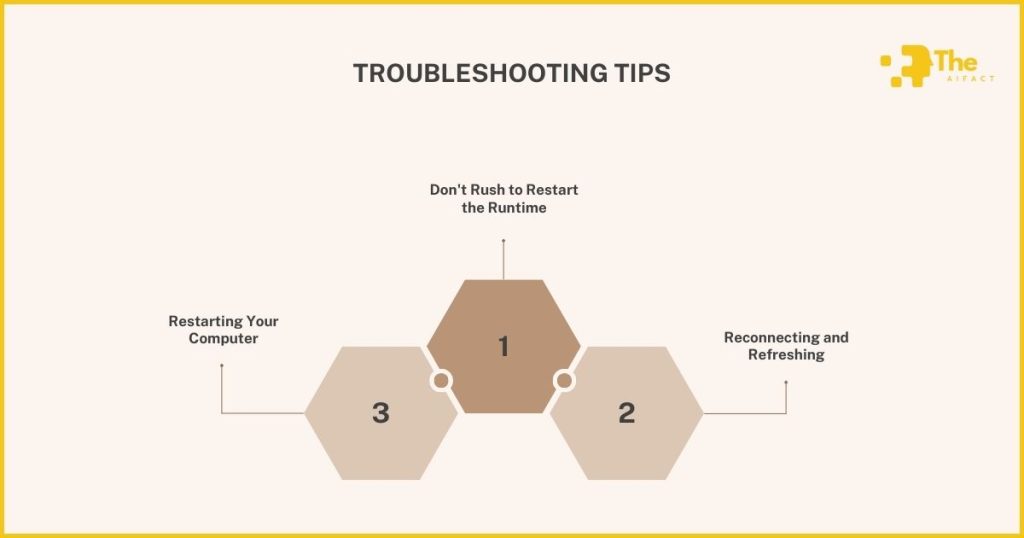
Even with meticulous preparation, you may encounter bumps along the way. Here are some tips to navigate common issues:
- Don’t Rush to Restart the Runtime: If you hit an error and the first instinct is to restart the runtime, pause. This can sometimes do more harm than good, resetting your progress. Instead, review the error message; often, the solution is simpler than you think.
- Reconnecting and Refreshing: If Colab becomes unresponsive or disconnects, re-establish your session using the ‘Connect’ button. If your generated video doesn’t appear, refresh the files list or rerun the generation cell.
- Restarting Your Computer: In rare cases where errors persist, or Colab is consistently unresponsive, a fresh start can help. Restart your computer to clear any lingering processes, then reopen your Colab notebook and try again.
Creating AI influencer videos is as much an art as a science. Each step, from uploading your files to executing the final code cell, is a piece of the puzzle. And like any art, it may require patience and problem-solving to see your vision come to life.
Step 6: Reviewing and Saving the Results
The moment of truth has arrived. Your AI influencer video, a product of your creativity and hard work, is ready to be unveiled.
This step is about accessing your masterpiece, ensuring its quality, and organizing it for future use or sharing. Learn how to retrieve, review, and store your generated video efficiently.
Accessing the Generated Video
After the final code cell has run its course and your video has been generated, it will be stored within Google Colab’s file system. Here’s how to find and download it:
- Navigate to the ‘Files’ section: On the left side of the Colab interface, you’ll find the ‘Files’ icon (it looks like a folder). Click on it to expand the file tree.
- Locate Your Video: Your generated video will typically be named something intuitive, like ‘swapped.mp4’, making it easy to identify. If you don’t see it immediately, update the list using the refresh button at the top of the ‘Files’ section.
- Download the Video: Right-click on your file and select ‘Download.’ The video will then be saved to your computer’s default download location, ready for you to view and share.
Organizing Results
With your video downloaded, the next step is to ensure it’s properly organized. This helps keep your work tidy and makes it easier to locate and use your videos in the future. Here are some suggestions:
- Create a Dedicated Folder: If you haven’t already, create a folder on your computer for your AI influencer videos. This could be named after your project or influencer, providing a central location for all related files.
- Rename for Clarity: While ‘swapped.mp4’ is descriptive within the context of Google Colab, it might not be as informative later on. Rename your video file to something more meaningful, incorporating your influencer’s name and the video’s context. For example, ‘InfluencerName_DanceChallenge.mp4’.
- Version Control: Include version numbers or dates in your file names if you plan to generate multiple versions of the exact video (perhaps with different target videos or slight edits to the source image). This will help you track the evolution of your project and quickly identify the most current or successful versions.
Following these steps to access, download, and organize your AI influencer videos will ensure your work remains accessible and understandable.
Step 7: Optimizing Source Images and Target Videos
As we near the completion of our guide on creating AI influencer videos, it’s crucial to reflect on the foundational elements that contribute to the success of these projects.
The quality of your source images and the characteristics of your target videos play pivotal roles in determining the overall effectiveness and appeal of your final output.
Here, we’ll delve into optimizing these key components to ensure your AI influencer videos are not just good but exceptional.
Optimal Conditions for Success
Achieving the best results from your AI influencer videos requires attention to detail. Here are some recommendations to optimize both your source images and target videos:
- Source Image Quality:
- High Resolution: Select a source image with the highest resolution possible. This ensures that the AI can accurately capture and replicate the facial features of your influencer.
- Neutral Background: A simple, neutral background helps the AI focus on the face without distractions, making the overlay process smoother.
- Consistent Lighting: Ensure the lighting in your source image is even and natural. Inconsistent or harsh lighting can lead to anomalies in the final video.
- Front-Facing and Expressive: Choose a front-facing photo with a clear view of the influencer’s face. A neutral expression is versatile, but having a range of expressions can add dynamism to your videos.
- Target Video Characteristics:
- Stable and Clear Footage: Your target video should be regular (minimal shaking) and transparent. This stability assists the AI in accurately mapping the source image onto the video, resulting in a more cohesive final product.
- Visible Face: The subject’s face in the target video should be visible and not obscured by objects, shadows, or extreme angles. The more visible the face, the better the AI can perform the face swap.
- Moderate Movement: While some movements are acceptable, excessively fast or complex movements can challenge the AI’s ability to maintain a realistic overlay. Aim for scenes where the subject’s movements are measured and not too rapid.
- Consistent Lighting: Just like with the source image, constant and natural lighting in your target video enhances the realism of the final AI influencer video. It helps in blending the source face more naturally into the video environment.
Remember, the goal is to produce content that engages and captivates your audience with realism and creativity. Each element, from the clarity of your source image to the quality of your target videos, contributes to this goal.
FAQs About AI Influencer Video Creation
1. How do I start creating AI Influencer Videos?
Begin by selecting high-quality source images and target videos. Use tools like Google Colab for processing, where you can run scripts to generate your AI influencer videos. Organize your files and follow step-by-step guides carefully.
2. Do I need permission to use someone’s video or image?
Always obtain consent from the content creators or use royalty-free, consent-granted assets to avoid legal issues. If you’re using content for educational purposes, clearly state your intent and adhere to fair use guidelines.
3. Can I use any video as a target video?
Choose target videos with clear, steady shots of the face you wish to replace for best results. Ensure the lighting and background are consistent for a more seamless face swap.
4. How can I improve the quality of my AI influencer videos?
Optimize your source images and target videos by choosing high-resolution, front-facing photos with neutral expressions and well-lit, steady videos. Experiment with different settings and scripts to refine the output.
5. What should I do if my video generation process fails?
Review error messages for clues to ensure all files are correctly named and paths are accurately inputted. Restarting the runtime or the entire process in Google Colab can resolve the issue.
6. Is it free to create AI Influencer Videos?
Tools like Google Colab offer free resources for processing AI influencer videos, but be mindful of the limitations. Some scripts or software require payment for advanced features or increased processing capabilities.
7. How long does it take to create an AI influencer video?
The time required can vary widely based on the video length, complexity, and computational resources. Expect anywhere from a few minutes to several hours for processing.
Conclusion
As we wrap up this comprehensive journey through the creation of AI influencer videos, it’s clear that the path to mastering this innovative form of content is both challenging and immensely rewarding.
The steps outlined in this guide provide a roadmap, but the true magic lies in your hands. Each decision, from selecting the perfect source image to fine-tuning your target video, contributes to a unique creation that has the potential to captivate and engage audiences like never before.
Embrace the process of experimentation. The realm of AI influencer videos is vast and varied, offering endless possibilities for creativity and expression.
Don’t be afraid to try new ideas, push boundaries, and explore uncharted territories. Each attempt will give you valuable insights and skills to refine your craft and elevate your content.
I encourage you to share your creations and experiences. Whether it’s a breakthrough moment or a stumbling block, your journey is invaluable to the growing community of AI video creators.